- Keep the test materials at standard conditions for the specified duration.
- Cut or slit the label to the specified dimensions.
- Clean the standard test surface (stainless steel of specified surface finish or glass) with solvent.
- Apply the label to the test surface with a standard roller (of specified mass, dimensions and hardness).
- Wait the specified dwell time before initiating testing.
- Remove the applied label at either a 90° or 180° angle and 300 mm/m (12 in./min.) speed.
- Record data during the peel process.
These test methods all assume that the label material meets the test method’s sample width requirement, which is typically 24 mm (1 in.) wide. In addition, the usual test duration is based on a label sample of a length suitable to apply 96 mm (4 in.) of the adhesive-coated side of the label sample to a standard test panel.
However, many converted labels are narrower (and, in some cases, shorter) than the test method requirement specified. This does not mean the labels cannot be tested; rather, some procedural steps must be modified in order to obtain relevant data and results.
Test results obtained when using the modifications described in this article may not compare exactly to those attained when testing labels of the same material of the full required dimensions. There are some inaccuracies built in to the testing of narrow labels.
- There may be edge effects caused by the converting operation, which would be more pronounced on a narrow label than a more suitable one of full width.
- Small labels are sometimes printed and die-cut with the longer dimension in the cross-machine direction. Standard methods specify testing labels in the machine direction.
- A standard size and mass roller is used to apply the label to the test substrate. It should be noted that there is typically greater application pressure on a narrow label than on a standard 24 mm-(1 in.) wide label, although steps can be taken to reduce this effect.
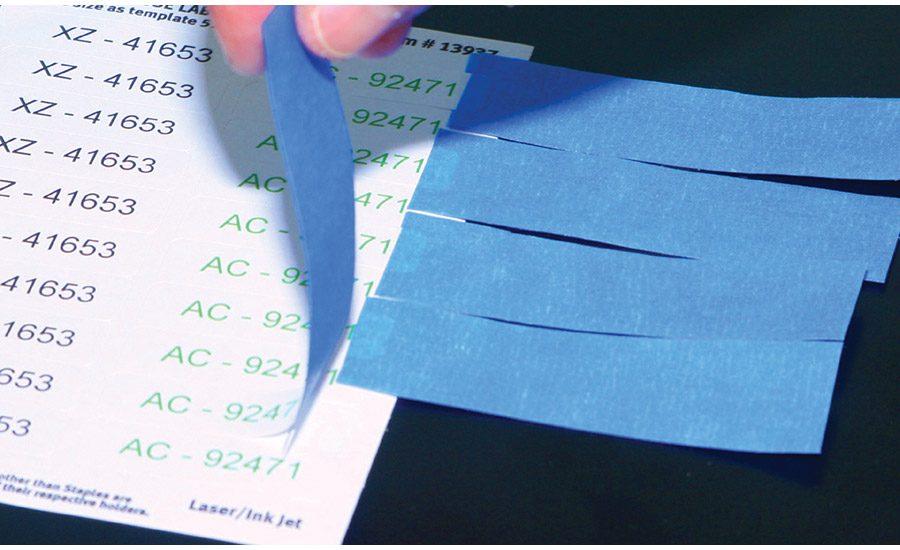
As noted, converted labels that are narrow in width are frequently short in length. This will cause problems, as the sample is not long enough to place one end in the jaws of the testing instrument while the other end is adhered to the test panel. In this case, a small label must have a “leader” attached to one end to facilitate this operation. This can be accomplished by using an aggressive masking tape, a packaging tape, or, for difficult-to-adhere-to labels, a silicone splicing tape (see Figure 1) as a leader. The exact length of the leader is not crucial; it just needs to be long enough to allow slack in the leader when the sample is placed in the test instrument jaw.
In addition, the test technician should choose a leader material that has a level of stiffness similar to that of the converted label to be tested. If the stiffness of the label and the leader is significantly different, the actual peel adhesion test results may be negatively affected.
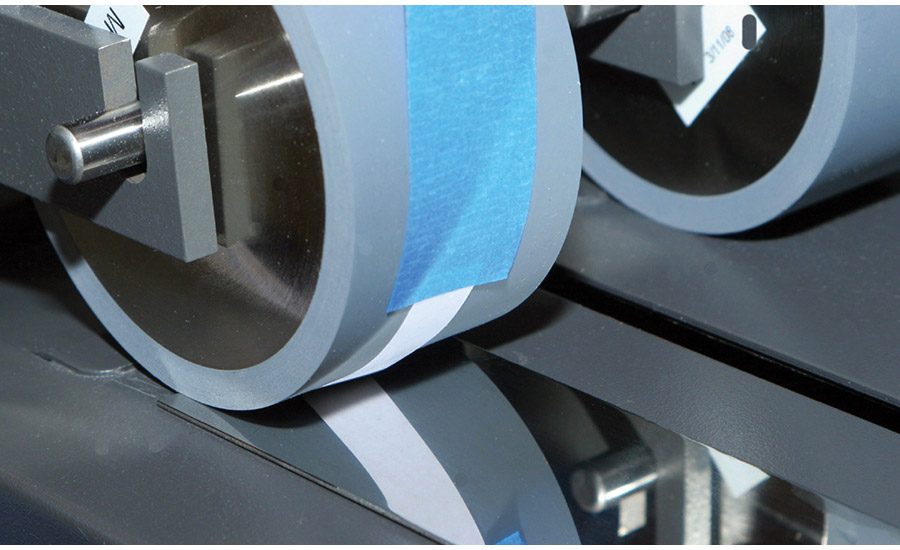
Label application to the test panel is usually performed in the specified manner with a standard roller. The roller is 44 mm (1.75 in.) wide and 81 mm (3.25 in.) in diameter, has a mass of 2 kg (4.5 lbs), and has a durometer hardness of 80. See the label application in Figure 3.
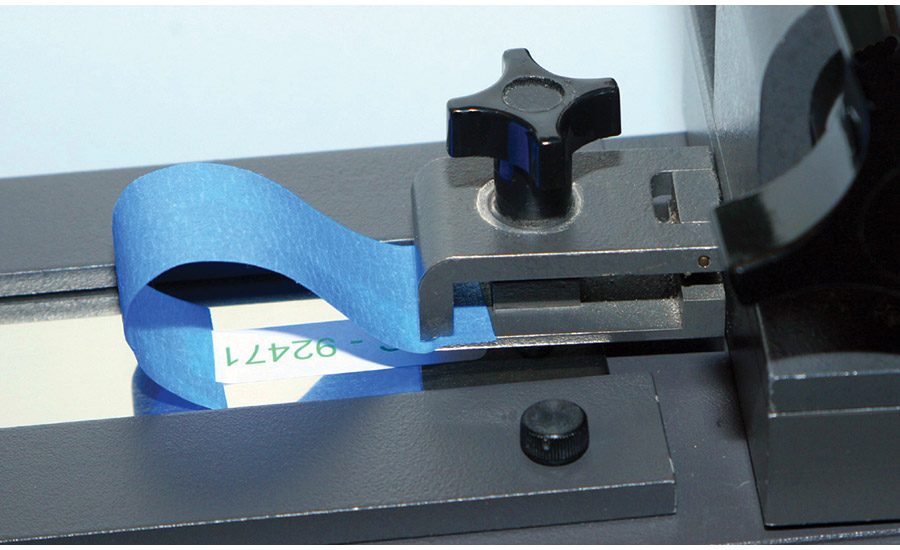
Keep in mind that, because of the label’s narrower width, the roller pressure on the label is actually greater than what’s typical for a label of the specified width, resulting in a non-conformance to the requirements of the test method regarding the actual roll down pressure that is applied. To remedy this, additional non-test labels can be placed next to and parallel to the test label prior to the roll-down operation. The total width of all the labels under the width of the roller must be equal to that specified in the test method. The label is then peeled from the test panel at either a 90° or 180° angle at a 300 mm (12 in.) per minute speed (see Figure 4).
Another deviation from standard peel adhesion methods is in the area of data acquisition. Standard methods typically state that the first and last 24 mm of test data should be ignored, and that the 48 mm of data should be collected in between the two areas. Because the labels in question may be under 50 mm in length, it is not possible to follow the test method precisely.
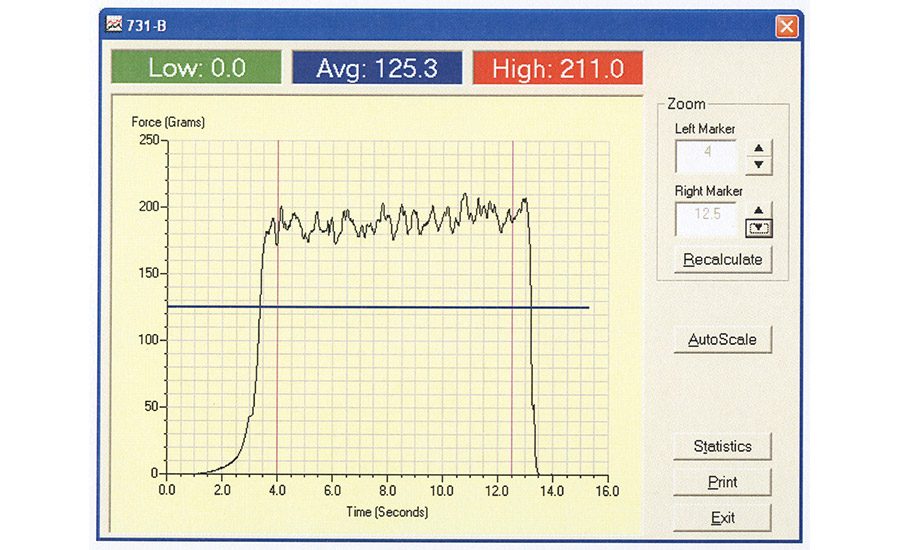
To ensure that test results for small labels are valid and useful, the generation and capture of a graphical representation of the data stream is essential. Because the labels are short in length, it is important to collect as much data as possible. To accomplish this, it is necessary to initiate test data acquisition before peeling of the label begins and continue collecting data a short time after the label is completely removed from the test panel.
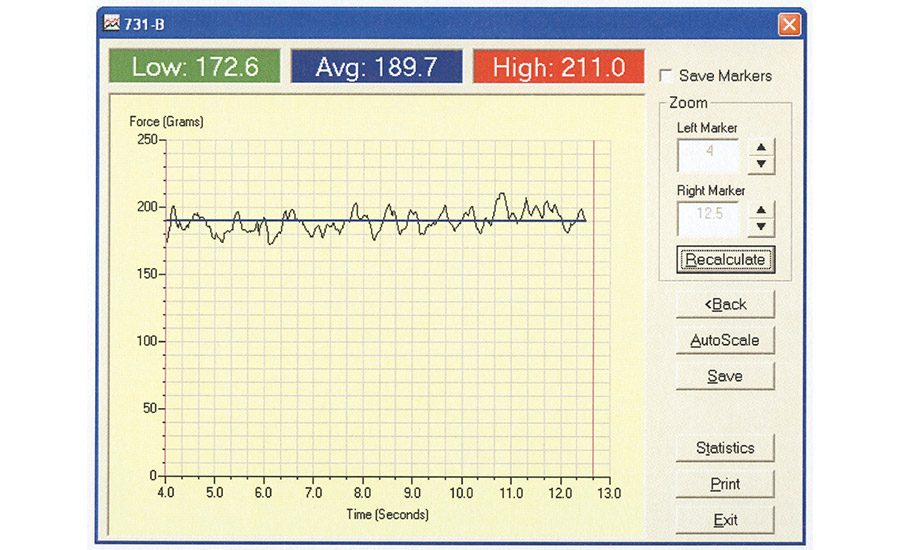
The test technician should review the resulting graph to ensure that the section of label removal is relatively flat. Eliminate data from the stream before and after the flatter portion of the curve (see Figure 5), then average the data that remains (see Figure 6), and normalize it to the desired units.
Testing Problem Labels
Testing the peel adhesion values of narrow or short labels is not the only challenge for the testing technician. On occasion, it is necessary to test the peel adhesion value of a label stock with a face material that is either soft and extensible or frangible.
Labels with polyethylene or vinyl face materials are good examples of soft and extensible labels. In this situation, peel testing results in a different potential problem: if the adhesive bond is strong enough, the stock may stretch when pulled, resulting in the generation of erroneous peel adhesion test results.
Labels with thin, tissue-like paper face materials or destructible vinyl are good examples of frangible labels. While they will ultimately perform as intended, they will also fracture during peel adhesion testing, resulting in erroneous peel adhesion test results.
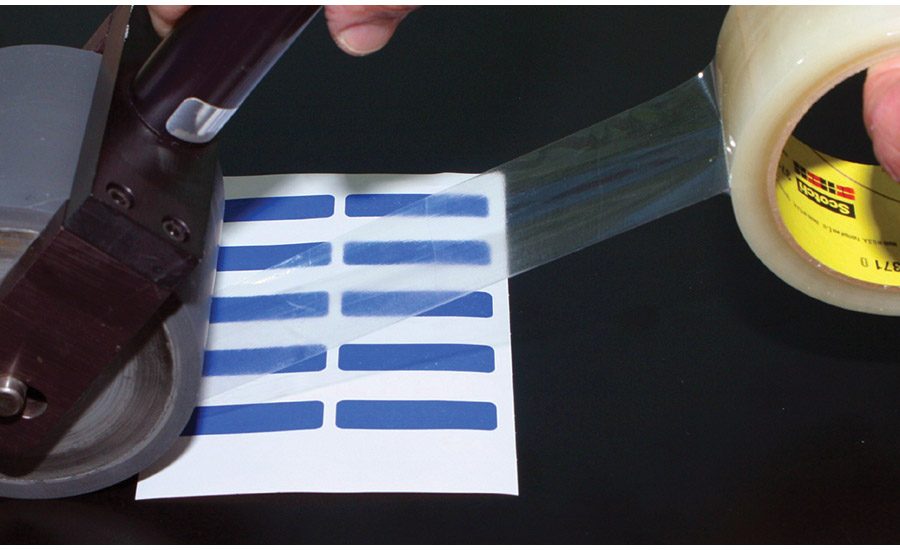
In order to more accurately determine the actual bond strength of the adhesive, it is necessary to eliminate the stretching force or destructibility of the label face material. This is typically done by over-laminating the label with a non-extensible but strong pressure-sensitive tape—usually a bi-axially oriented polypropylene film (BOPP) hot-melt box sealing (packaging) tape (see Figure 7). These tapes have an aggressive adhesive, are generally lightweight, are relatively strong and will not stretch when used as an overlaminate for testing labels.
The overlaminate should be applied to the label with a standard roller to ensure that bubbles and wrinkles are not entrapped between the label and tape. It should also be applied to the label while the release liner is still affixed to the label, prior to application of the label to the test panel surface. Excess overlaminated tape can then be trimmed with scissors or a razor knife. Depending on the label face stock material, ink used to print the label or surface treatment, it may be necessary to allow the overlaminating tape to dwell on the label for up to 24 hrs to allow the bond to strengthen. The overlaminating tape can also be used as the leader described above when testing narrow or short labels.
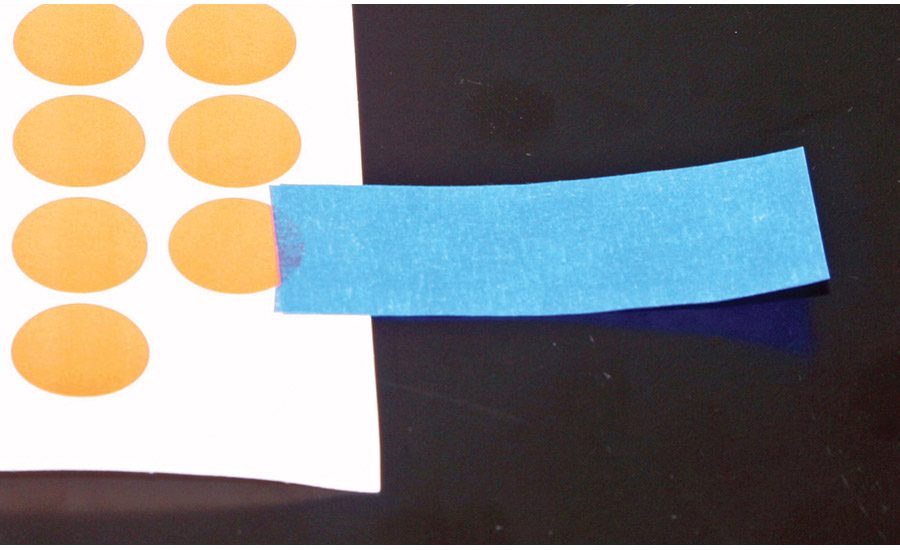
Another factor that must be considered is label geometry. Large labels, even those with non-parallel sides, can be trimmed to have a constant width. Trimming is not an option with small labels. Circular, oval, diamond-shaped and free-form labels pose an additional problem. Data is typically gathered over a length of the sample and averaged; since there is not a constant width, peel force varies and should not be averaged.
There are several ways to deal with this problem. The most common method of interpreting data with a non-consistent width is to measure either a typical force or the peak force at the widest dimension. The magnitude of the results will not necessarily correspond to that of a full-sized label tested by the standard method, but they can be used to distinguish different labels of the same geometry.
Summary
Small labels can be tested using modified standard methods. It must be understood that the deviations to standard test methods described in this article are best for comparing labels of the same size, shape and construction that are tested in an identical manner. Comparison of results from any modified test sample preparation method to results of full-size labels tested by the standard method may not be valid and should be avoided.
For more information on peel adhesion testing, visit www.chemsultants.com.
